Cilantro LIME Turkey Burgers, Oh My!

Probably the best turkey burger I have ever created. These burgers are moist, flavorful and packed with protein and veggies! My favorite take-to-work lunch by far!

You’re welcome! I’m not going to make you read a lengthy blah-blah blog about turkey’s and their meat and why ground turkey is a great protein that can often be dry.

Nope. Instead I will just say this recipe is fabulous, flavorful and MOIST, not dry. The grated zucchini really does the trick and you don’t even know it’s there. It just quietly does it’s job. (Thank you, zucchini.)

If you’re in the mood, you can roll these into meatballs and serve them over zoodles, but we’re not here for that today, are we!

Ingredients

  • 1.5 Lb. ground turkey (ground chicken works, too)
  • 1 medium zucchini, grated
  • 3 or 4 large limes (zest and juice)
  • 1 bunch cilantro, chopped
  • 1 medium red onion, diced
  • 1/2 bunch of fresh chives, chopped (more if you love chives)
  • 3 Tbsp olive oil
  • 3 Tbsp soy sauce (skip it if you’re watching your sodium intake)
  • 3 Tbsp Chili Lime Seasoning (use your favorite)
  • 2 Tbsp granulated garlic
  • 1 Tbsp each, salt and pepper
  • 2 Tbsp butter (use REAL butter or I will come to your door and chastise you)
  • 2-3 Tbsp Trader Joe’s 21 Seasoning Salute

Instructions

  • Preheat oven to 375 degrees
  • Mix all ingredients except the butter and 21 Season Salute. Form 12 burgers.
  • Bake for 30 minutes.
  • Remove from oven, slather each burger with butter and sprinkle with the 21 Seasoning Salute.
  • Broil 2 minutes to brown.
Say hello to my little friend!

Curry Chicken Thighs, Oh My!

My husband has been after me to try curry for years and now that I have I’ve decided I need it in my life forever! I mean honestly, what was my problem! Curry is delicious!

This recipe is so incredibly easy, it will make an excellent weeknight dinner! AND the ingredients are so simple, you’ll be able to make it without a recipe!

I know Indian food is usually served with Basmati rice, but I am going through an “I’m sick of making rice” phase so we served this over really good egg noodles. My husband has told me thirty times that noodles were the correct choice. Who am I to argue?


Ingredients:

  • 6 boneless chicken thighs (use bone-in if you like them better)
  • 1-2 Tbsp olive oil
  • 1 large onion thinly sliced
  • 4 carrots peeled, sliced down the center & cut into largish chunks
  • 2 cans chopped tomatoes (I used fire roasted)
  • 1.5 Tbsp minced ginger
  • 2 Tbsp minced garlic (measure with your heart, I always use more)
  • 1.5 Tbsp curry powder
  • 1/2 Tbsp Turmeric (more if that’s your thing. See how nice I am?)
  • 1 cup chicken broth
  • 3/4 cup heavy cream (or coconut milk)
  • 1/4 cup freshly chopped cilantro
  • Salt, pepper, granulated garlic & cayenne pepper

Directions:

  • Season chicken thighs generously with salt, black pepper, granulated garlic & cayenne.
  • Heat oil in a deep sauté pan over medium-high heat. Add chicken, skin side down, and brown 2-4 minutes per side. Transfer to a plate.
  • Add more oil if necessary. Add the carrots then reduce heat to medium-low and cook 4-5 minutes until a little soft & brown in spots. (This means putting them in the pan and not moving them around a lot!)
  • Add the onions and cook 3-4 minutes or until softened.
  • Add curry powder, ginger, Turmeric and garlic and cook about 20 seconds.
  • Add tomatoes, chicken broth and cream (or coconut milk). Return chicken thighs to the pan.
  • Bring to a boil, reduce heat to low, cover slightly and simmer 25-30 minutes or until chicken is cooked through to 165 degrees. (For a thicker sauce, remove the chicken and simmer uncovered about 30 minutes or until reduced by half. Add the chicken back.
  • Adjust seasoning if desired. Stir in some of the cilantro but save some to garnish with as well.

Lemon Cilantro Baked Cod Fillets

I have always been that person who thought cilantro tastes like soap. That is, until I started living with my husband, who is a fanatic over the stuff…

I have always been that person who thinks cilantro tastes like soap. That is, until I started living with my husband, who is a fanatic over the stuff. At any given moment during the year, we have not one, but two bunches sitting in water on our counter; so over the summer I decided to give in and start using the stuff and now I am hooked.

I adapted this recipe from something similar that called for parsley instead of cilantro. I imagine it would also be great with fresh chopped basil or even rosemary.

I love this recipe because it’s unexpectedly creamy and it smells incredible! Prep time is just a few minutes and you can assemble this dish ahead of time if you need to- just pop it in the fridge until you are ready to bake.


Start off with with cod fillets. We buy ours frozen from Trader Joe’s. Once it’s thawed, be sure to pat it dry on both sides so the melted butter will adhere to it.


Next melt about 4 Tbsp real butter (none of that no fat, low fat, fake butter crap! Use the real stuff!) We buy Amish butter. You can’t beat the freshness.


Now for the dredging stations: 1) This is about 3/4 cup of flour, mixed with a generous amount of smoky paprika, salt and pepper and one of my favorite spice blends: Essence of Emeril.


2) Next, I zested one very large lemon and squeezed its juice (about 3 Tbsp, I said it was large!). For fun, I also zested a Meir Lemon. Then add about 1/4th cup chopped fresh cilantro. When your butter has melted, add it here.


Here it is with the melted butter.


Dredge each piece of cod, both sides in the butter/ cilantro mixture and then the flour. The original recipe called for dredging only one side but I always do both. I suppose you could leave out the flour entirely, but the dish will not turn out as creamy. (It will, however, still be delicious!)


Spray your baking dish with coconut oil (or whatever you have on hand-or leave it out. I forgot this step tonight. It made no difference.), then lay out your fish. Pour the remaining butter/cilantro mixture over the fish. Here, I usually toss in a little more cilantro and sprinkle a little more paprika.


PS: This stuff? It’s your friend when you don’t feel like chopping. Find it at the grocery where you buy fresh spices.


Bake at 400 degrees for 15-20 minutes or until flakey.


We made roasted butternut squash, zucchini and baby Roma tomatoes as our sides. These just go in at 400 degrees coated in olive oil, salt and pepper. All on one sheet pan. I make then before I bake the fish, the cover with foil and let them rest.


Fresh out of the oven.


The thought occurs to me that I could have mixed the tomatoes in with the squash. I like to keep the zucchini whole, however. It’s a texture thing for me.


INGREDIENTS
4 tablespoons lemon juice
4 tablespoons butter, melted
1/4 cup all-purpose flour

1/2 teaspoon salt

2 Tbsp smoked paprika

1/4 teaspoon lemon-pepper seasoning

4 cod fillets (6 ounces each)

2 tablespoons minced fresh cilantro

Zest of 1-2 lemons

DIRECTIONS
Preheat oven to 400°. In a shallow bowl, mix lemon juice, cilantro and butter. In a separate shallow bowl, mix flour and seasonings. Dip fillets in lemon juice mixture, then in flour mixture to coat both sides; shake off excess.

Place in a 13×9-in. baking dish coated with cooking spray. Drizzle with remaining lemon juice, cilantro, butter mixture. Sprinkle on a little more paprika & lemon pepper. Bake 15-20 minutes or until fish just begins to flake easily with a fork. Garnish with more fresh cilantro & lemon zest.

Hot Brown Casserole ala Bahbah (That’s Me!)

Here in Louisville, Kentucky, it’s Kentucky Derby week. Hubs and I are catering a Derby party next weekend, so last night we tested and perfected one of my new favorite dishes, The Hot Brown Casserole.

For those who are not from here, The Kentucky Hot Brown is a famous dish born long ago at Louisville’s historical “Brown Hotel”. (Google it, if you are interested.)

I confess that I have not been a fan of this dish in the past. I think when it was originally made by it’s Chef creator, it was probably delicious. Every rendition I have ever had, however, has left me feeling like something was missing or “watered down”. For this dish to be truly great, one really needs not to skimp on or take short cuts on the ingredients. This means taking the time to grate your own cheese, bake a fresh turkey breast (or a whole bird if you wish), seek out the best thick bread slices and seasonings!

Hot Brown Casserole ala Bahbah

Serves 12

Ingredients:

  • 6 slices thick bread, toasted (I used Texas toast)
  • 2 lbs turkey thinly sliced
  • 8 slices bacon crumbled (I used Wilson’s thick cut BBQ)
  • 1 cup grated Pecorino Romano cheese
  • 1/2 cup grated Parmesan cheese
  • 3 cups milk
  • 2 cups cream
  • 1/4 cup butter (real full fat butter!)
  • 1/4 cup flour
  • 1/4 teaspoon salt
  • Lots of freshly cracked pepper
  • 1/4 teaspoon paprika (I used Bourbon smoked)
  • 1 1/2 cup freshly diced tomato
  • 2 teaspoons freshly minced parsley

Directions

Preheat oven to 350°

In a large saucepan over medium heat, melt butter, whisk in flour and let the flour cook about two minutes, stirring constantly. Whisk in milk and cream. Stir 6-8 minutes until it lightly boils and becomes thick. Remove from heat.

In a small bowl, beat the egg then whisk in 1/2 cup to 1 cup of sauce. Return to pan whisking constantly. Add in 1/2 the cheese, salt and pepper and keep whisking until incorporated. Add in 1/2 the remaining cheese & repeat. Return to the heat, but Do NOT BOIL. IMPORTANT: Taste this until you get the desired cheesiness /creaminess. Also, If it gets too thick, add more cream, but remember to season again if you do. Remove from heat.

Grease a 9 x 13″ casserole dish. I pre-slice the toast on the diagonal, then arrange it in the bottom of the pan. Layer the turkey slices over the toast, sprinkle some of the tomatoes and the bacon over the turkey, salt and pepper, add the sauce all over. Sprinkle with Paprika, bacon crumbles and the remaining cheese.

Bake 20-25 minutes uncovered.

Top with freshly chopped tomatoes and parsley.

Enjoy!

Roman-ish Chicken

If you are like me and are not a fan of dark meat, this recipe will convert you. I promise.

My poor husband has to live with all of my silly food likes and dislikes. He is a guy who really loves all types of food and though I love to cook, I confess that I’m not a fan of some of the things he really loves. Dark meat happens to be one of his favorites. Each time we’re at the store together he gravitates to chicken thighs and suggests we make them. Stubbornly, I refuse because I hate dark meat. (Well I used to refuse until I found this recipe!)

Just look at that photo up there! With this cast of characters, how can anyone not like this recipe! The bonus is that it’s super easy (and cheap) to make!

First you lay out your chicken pieces making sure to pat them dry. After seasoning them with salt and pepper, brown them on both sides in a dutch oven. It isn’t necessary that they cook all the way through at this point. You are just looking for a nice color on both sides. When this is to your satisfaction, remove the pieces and set aside.

img_7119

Using the same pan, cook the bacon three quarters of the way to crisp, then add in the rest of the vegetables to saute until soft. Don’t forget to season and reseason every step of the way!

img_7120

Once your veggies have reached the desired consistency, add in a can of diced tomatoes, half of a cup of dry white wine, half of a cup of chicken stock, half of a cup of your favorite marinara (I use only Rao, because it’s Keto-approved. You may also make your own fresh marinara if you choose.) Here I threw in a whole bunch of fresh herbs from my garden and also more fresh cracked pepper and salt.

img_7121

I let this simmer for a few minutes to allow the flavors to marry and then I add back in the chicken. It’s not a beautiful picture, from here I let the chicken and the sauce simmer for about twenty minutes to allow the chicken to cook through. Charlie suggested last time that olives would be great in this. I agree. I also think artichokes would be tasty as well.

img_7122

Once it’s all cooked through, all that remains is to serve it over whatever your heart desires OR to serve it alone with a side of green vegetables. This will do well over rice, pasta, zoodles and even quinoa.


Roman-Ish Chicken
Serves 6

Ingredients:
4 boneless, skinless chicken thighs (you may use bone in, skin on if preferred)
2 boneless, skinless chicken breasts (you may use bone in, skin on preferred)
1/2 teaspoon salt, plus 1 teaspoon
1/2 teaspoon freshly ground black pepper
1/4 cup olive oil
1 medium onion, chopped or sliced (however you prefer)
1 red bell pepper, sliced
1 yellow bell pepper, sliced
6 pieces of bacon, chopped
2 cloves garlic, chopped
1 (15-ounce) can diced tomatoes
1/2 cup white wine
1 tablespoon fresh thyme leaves
1 teaspoon fresh oregano leaves
1/2 cup chicken stock
2 tablespoons capers
1/4 cup chopped fresh flat-leaf parsley leaves

Optional Ingredients:
¾ cup thinly sliced eggplant (I grow Japanese eggplant, so that’s what you are seeing in the photo)
½ cup sliced olives (whatever type you like)
¾ cup jarred quartered artichokes

Directions:
Season the chicken with 1/2 teaspoon salt and 1/2 teaspoon pepper. In a heavy, large skillet, heat the olive oil over medium heat. When the oil is hot, cook the chicken until browned on both sides. Remove from the pan and set aside.

Using the same pan over medium heat, add the bacon & cook it until it’s just about crisp, then add the onions and peppers (and whatever other fresh veggies you may decide to add), and cook until tender (about five minutes or so). Add the garlic and cook for 1 minute. Add the tomatoes, wine, and herbs. Using a wooden spoon, scrape the browned bits off the bottom of the pan. Add the stock. Stir. Return the chicken to the pan and bring the mixture to a boil. IF you are adding jarred olives and/or artichokes, you would add them here. Reduce the heat and simmer, covered, until the chicken is cooked through, about 20 to 30 minutes.

Just prior to serving, stir in the parsley and capers.


Dreamy Creamy Cauliflower Casserole

I wasn’t prepared to love this as much as I did. Try it. You will see for yourself!

Yesterday, I started over on my keto program. I had been doing it in earnest all the way through Lent and then poof, I fell off the wagon. I could blame it on the fact that I am a potato chip addict and every time I visit my mother she insists on putting out bowl after bowl of junk food. Every Thursday she puts out a bowl of chips, a bowl of Cheetos, a bowl of Doritos, etc. Then she chides me until I humor her and eat some. (Anyone else have a person like this around?) In her defense, she’s in her mid-eighties and she’s hard-wired like this. Plus, I should have better will power.

I like to start my projects on Mondays, so yesterday was the day to re-invest in the keto lifestyle. Sunday night I planned out my weekly menu and last night was the night to try the cauliflower casserole! Honestly, I wasn’t expecting it to turn out as delicious as it did! Charlie and I both got up this morning talking about how great it was and how neither of us felt hungry for breakfast.

The instructions and the ingredients are very basic, so here you will see only the last steps. This is what it looked like all mixed together prior to adding the cheese and bacon toppings. I could have just baked it like this and it would have been great.

img_6811

Add the remainder of the cheese on top:

img_6813

Then add the last of the bacon. Don’t skip this step. The extra bacon makes the house smell divine and it adds a little bit more of a smokey flavor to the dish.

img_6815

Here it is freshly out of the oven. I didn’t wait for it to get really brown.

img_6817


Dreamy Creamy Cauliflower Casserole (serves 8)
Ingredients:
1 head fresh cauliflower
8 oz. cheddar cheese, freshly grated, divided
8 oz. Monterey Jack cheese, freshly grated, divided
8 oz. cream cheese, softened
¾ cup full fat cream
2 bunches green onion, chopped
6 pieces of bacon, cooked
2 cloves fresh garlic, minced
Salt & Pepper to taste

Directions:

Preheat oven to 350 degrees.

Cut the cauliflower into bite-sized florets. Place in a microwave safe bowl with a half cup of water and cover. Microwave on high 4-5 minutes until cauliflower is steamed through. (I took mine out at about 4 minutes because I wanted it to still have a bite to it. Keep in mind, it is still going to be baked.) Drain into a colander.

Cook the bacon (I used the microwave for mine), chop it up and set it aside.

In a separate bowl, combine 8 oz. softened cream cheese with 6 oz. each of the cheddar and Jack cheeses, salt and pepper, and garlic. Add the cream a little bit at a time until the mixture is combined. Add the bacon (reserve 1 ½ Tablespoons for the top) and green onion; then add it all to the cauliflower. Stir gently to combine. Pour into a baking dish.

Smooth the surface with a spatula. Sprinkle the remaining cheese and bacon over the top.

Bake uncovered for 25 minutes or until brown and bubbly.

PS- If you don’t feel like grating your own cheese, you may substitute with pre-shredded. Keep in mind that pre-shredded cheese never has the same flavor as freshly grated.


Nutrition information:

1 serving is 1/8th of the casserole.

Calories: 379, Fat: 27g, Net carbs: 8, Total carbs: 10, Protein: 23g,Fiber: 2g


Here is another cauliflower recipe that I adore.


Seriously, does anyone else out there have a person who is constantly trying to sabotage your eating plan? How do you handle it?


Not Yo Mama’s Vegetarian Lasagna ala Bobbe

I have finally come up with a recipe for vegetarian lasagna that I think is worth sharing. Seriously, we loved this dish!

Recently I was asked by a wonderful lady if I would create a meatless lasagna for her to serve the vegetarians at her dinner party. Happily, I obliged even though I am not typically a lasagna maker. (Something about the ricotta cheese always messes me up and the dish ends up too gloopy.)

I started this dish just thinking about vegetables I like to eat together. Spinach and artichoke always find themselves front and center wearing gold stars, when I start this thought process. Next, what items could I add for taste, color and texture: onions, shredded carrots and chopped Shiitakes! Perfect combo!

Then I thought about my issues with ricotta and I remembered watching an episode of “The Pioneer Woman” where she made hers with a yummy Béchamel sauce (white sauce) instead of ricotta. I questioned this though, because of this being a meatless dish. When there is no meat present, flavors are different and I worried that Béchamel might make a squishy, drippy lasagna. What to do; what to do?

I decided to make a sauce using heavy cream, cottage cheese, finely grated Parmesan cheese, a little corn starch, an egg and some fresh garlic. Then I put together my red sauce and got the rest of my ingredients assembled and ready to go.

Cast of characters:

I should mention too, that I grated a block of Fontina cheese to mix with the bagged Mozzarella for more flavor. To make it easier, and because I was only making this in an 8″ x 8″ pan, I used no boil noodles-they are shorter.

Then it was a simple matter of layering. First, a thin layer of tomato sauce, etc.

Then repeat the layers until the top is reached.

Bake at 375 for 30 minutes covered. Then 10 minutes more, uncovered, until brown and bubbly.

The final secret is to let it cool for 20-25 minutes before serving, otherwise, it will wilt as it did below. (I was hungry! It still tasted great!)

Oh and PS, I tested this recipe the night before I made it for my friend. My version didn’t include the carrots and mushrooms. It also had way too much fresh garlic and I had added too much lemon zest to my white sauce. I like to add a little zest to ricotta because it lightens it up, but it didn’t work here because duh, I was using cream. It actually made the dish a little sour. The recipe posted below includes my tweaks. You’re welcome.

((Hugs and love))


Ingredients:
White Sauce:
2 cups cottage cheese
1 cup heavy cream
2 cloves garlic (minced)
1 egg
1 ½ cups finely grated Parmesan cheese
½ tea. Salt
Red Sauce:
(1) 28 oz can of crushed tomatoes (OR you can buy a can of San Marzano’s and crush them yourself)
½ jar of your favorite prepared marinara sauce + 2 Tbsp. Olive oil
¼ cup freshly chopped basil
½ tea. Salt
½ tea. Pepper

1 pkg no boil lasagna noodles
(2) 8 oz. packages of frozen, chopped spinach
2 cans artichokes, quartered, then chopped
2 medium onions chopped
2 carrots grated
1 c. Shiitake mushrooms finely chopped (you can leave them chunkier if it’s your preference)
(2) 8 oz. bags of shredded Mozzarella
8 oz. grated Fontina
½ c. finely grated Parmesan Cheese

Directions:
Preheat oven to 375 degrees

Prepare both sauces and set aside. Neither has to be heated. Simply mix the ingredients and set aside. This can be done a day in advance and stored in the refrigerator if you like.

Sauté the onions, carrots and mushrooms until the onions are translucent. I started the onions & carrots about five minutes before adding in the mushrooms.

Thaw the spinach, combine it with the chopped artichokes and then squeeze out as much water as humanly possible. I use a cheese cloth. Then mix the cooked onions and carrots.

In a 9 x 13” baking dish, layer as follows:
Red sauce in the bottom
Noodles
Vegetable mixture (about half)
White Sauce
Mozzarella/Fontina Cheese
Red Sauce
Noodles
Repeat
When you reach the top your final layer should be Noodles, Sauce, and Mozzarella/Fontina cheese.
Finish by sprinkling a little Parmesan on top of this.

Cover loosely with foil that you have sprayed with cooking spray.
Bake 30 minutes covered.
Uncover and bake 10 minutes more or until brown and bubbly.
Important: Allow this to cool for 20-25 minutes before you serve it.

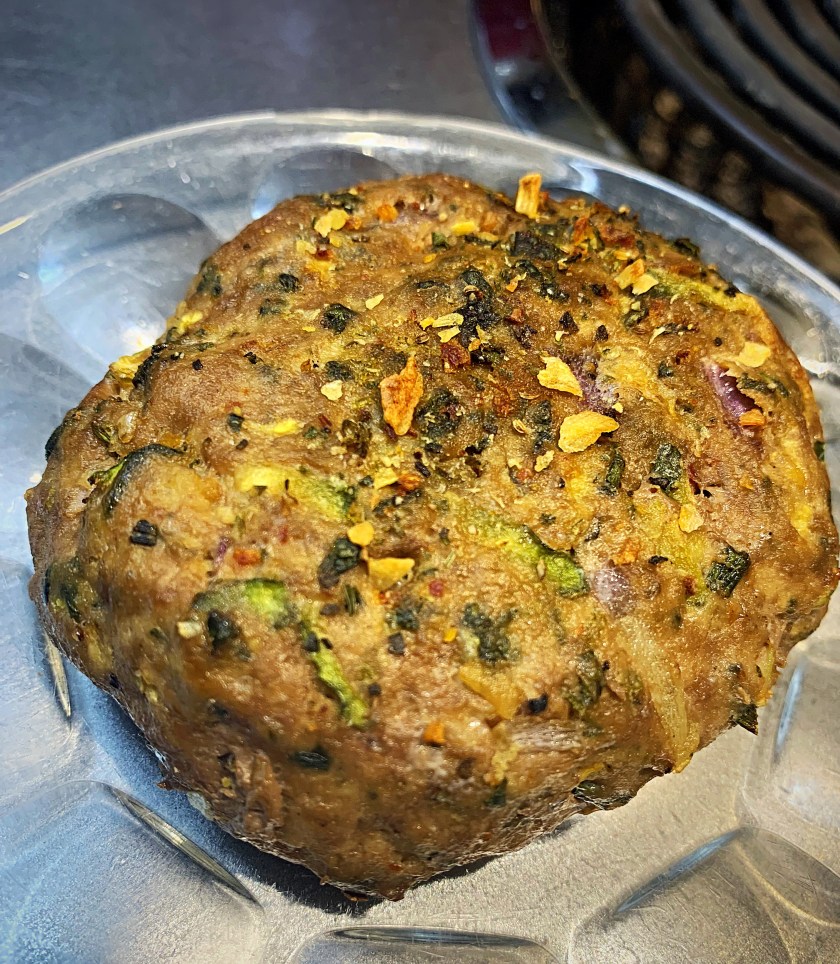
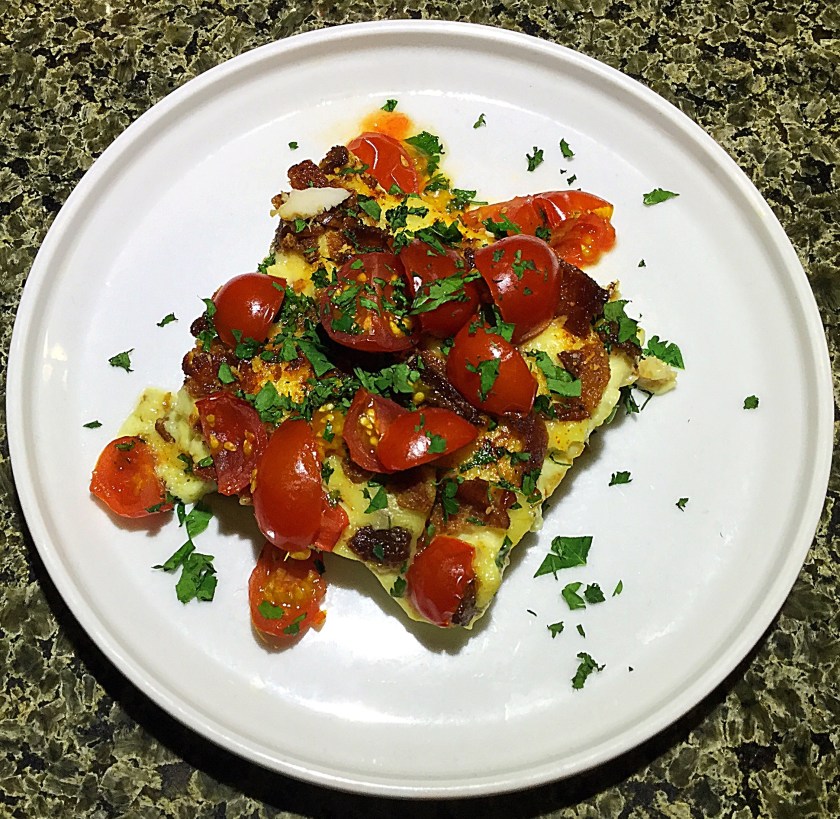
PS-I had leftover vegetable filling and cheese that I turned into a crust-less quiche for the following night’s dinner. It was so yummy. Just add 5 eggs and a half cup of cream. Bake at 350 degrees for 40-45 minutes.

This slideshow requires JavaScript.

Oh, Those Hot (Not Spicy) Italians! (Sliders, of course!)

Lately I have become crazy about any kind of sandwich. I don’t know if it’s a phase or what, but when I think of comfort food, my thoughts turn right to sliders and then my mouth starts to water!

img_3864

Last week when I pre-ordered the supplies for our Wednesday Night Fellowship Meal catering job, I made a mistake. (At least, this is what they tell me.) My original menu idea had been soups and sandwiches, but at the last minute I was inspired to make something else. I thought I’d cancelled my soup order, but when I got to the store, it was there. The store had ordered it in, so they informed me that I had to take it. Graciously, they agreed to store it for me until this week.

Long about 2:00 AM Wednesday morning, I started popping around Pinterest, looking for inspiration for my menu. My tomato basil soup is pretty yummy, so I already knew I’d be making this to go along with the home-style chicken noodle waiting for me at the store. I wanted to try some type of slider we’d not done before, so I settled on a version of an Italian slider I found on Pinterest.

The first step is to lay out all of your rolls in greased pans, taking the tops off. Then I made a softened butter mixture that included fresh basil and thyme (from my garden), granulated garlic, and dried Italian Seasoning.

Next is a layer of smoked ham. It’s important to fold the pieces so each sandwich has volume and texture to it. No one wants to bite into a flat meat sandwich. Yuck!

Next is a layer of pepperoni.

Then, a layer of your favorite Salami. This is Genoa.

img_3856-1

Then a layer of Roasted Red pepper. In the interest of time, I used a jarred variety. Were I making this at home, however, I’d have roasted my own peppers.

Then a layer of smokey provolone cheese. (We cut ours into squarish shapes- you don’t have to.)

The next time I make these, I will add one more layer which will be caramelized onions. I planned on doing it this time, but completely forgot about the onions I left in the car! Here, you simply replace the lids and then the fun part is drizzling a mixture of melted butter, Italian seasoning, garlic and Parmesan cheese over the top. Use a pastry brush to ensure every part of the sandwich is covered in butter.

Bake at 375 degrees for 20 minutes. I like to start them off covered for 15 minutes, then finish them uncovered for 5.

We paired these with a choice of tomato basil bisque or chicken noodle soup and a garden salad with sliced mushrooms and artichoke quarters. It was yummy and very very easy to do.

If you have a crowd to feed, sliders are the greatest option!


Ingredients
1-2 sticks of butter
2 Tbsp. freshly chopped basil (optional)
1 Tbsp. freshly chopped thyme (optional)
1-2 Tbsp. Dried Italian herbs (more if needed)
1-2 Tbsp. granulated garlic (more if needed)
1 package of sliced Hawaiian Type rolls. (I used a generic version.) 1 dozen.
1 package of Smoked Ham
1 package of large Pepperoni Slices
1 package of large Salami Slices
1 package of Smokey Provolone slices
1 jar of Roasted Red peppers (at home I would roast my own, but not for a huge crowd)

Directions
Preheat oven to 375.
Grease a baking pan and lay the bottoms of the rolls inside.
In a bowl combine one stick of softened butter with half the herbs of your choice.
Spread the butter mixture over the bottoms of the rolls.
Layer as follows:
1. Folded Ham Slices
2. Pepperoni
3. Salami
4. Roasted Red Peppers
5. Provolone Cheese
6. Put the tops back on.
Melt the remaining butter, add the herbs and then drizzle this over the tops of the buns being careful to coat each one.
Bake covered at 375 degrees for 15 minutes. Uncover and bake 5 minutes more or until the cheese is melted and the tops of the rolls are a little bit brown but NOT hard.

Pumpkin-Shaped Cheese Ball ala Bobbe!

Halloween is coming! Here is an easy, awesome recipe for a delicious and festive appetizer to take to your party! Who doesn’t love a pumpkin-shaped cheeseball? The bonus is that this is fun thing to make with your kids too!

In honor of Halloween coming, I thought I’d share one of the most fun recipes in my arsenal. I’m sure a lot of you are either hosting or going to Halloween parties this weekend. If you need to take a really fun appetizer, this cheese ball is delicious and it makes a GREAT presentation!

The photos you see here are from an adult cocktail party I catered this weekend, so my pumpkins don’t have faces on them, but you can absolutely dress yours up as a jack-o-lantern if you wish!

Also, I use this recipe for loads of Holiday parties. I’ve formed it into a carrot for Easter, made it into a Christmas Tree for Christmas and it’s even been a heart for Valentine’s Day!

I regret not having photographed the entire process but you are smart enough to picture the ingredients in a bowl. You start by making the cheese mixture. Once it’s combined, you lay it out onto plastic wrap, wrap it up and form it into a ball. Then I usually find a bowl that’s a little more round, place the ball in it and then refrigerate for about an hour. At that point, you take it back out and start forming your pumpkin shape with rubber bands.  See below?

img_3689

Once you have the basic shape, put it back in the refrigerator for at least a half hour. Then take it back out and cut off the rubber bands and remove the plastic. At this point you can add a topper. I saved the top of a bell pepper for this one.

img_3690

Once you have your topper selected and in place, all you do is sprinkle the outside with pulverized Doritos. If you don’t like Doritos, crush up Cheetos, or any orange/cheesy chip you happen to like.

img_3692

img_3701

At the party last weekend, I made three little pumpkin cheese balls and used them as decorations for my meat trays. As you can see by the photo, I went out to the garden and clipped a few tomato leaves to make the stems.

At this point, you can add your own touches. Have fun with it and enjoy because this cheese ball is delicious and kids and adults alike, LOVE the flavor!


Ingredients:

  • (2) 8 oz packages of cream cheese softened (I leave mine out on the counter overnight)
  • 1/2 package of Taco Seasoning (any brand)
  • 3/4 a small can of sliced black olives (chopped into tiny pieces)
  • 1 bunch of chives, chopped (you could also use scallions or regular onion)
  • 1 cup shredded cheddar cheese
  • 1 small bag of Doritos Nacho Cheese chips (or your favorite orange cheesy chip)
  • Stem from a bell pepper.
  • 4-5 rubber bands

Directions:

  • In a large glass bowl, combine all ingredients but the chips and stem. (I usually microwave the mixture for about 20-30 seconds to soften everything to make it easier.)
  • Turn the mixture out onto a piece of plastic wrap, wrap it up and start to form a ball.
  • Place your newly formed ball into the refrigerator for an hour.
  • Once chilled, form the pumpkin shape by using the rubber bands. Chill again for 30 minutes.
  • Place the chips in a zip lock baggie and beat them until they are dust. OR you can use a food processor, but trust me, beating them is more fun!
  • Cut the rubber bands off, remove the plastic, add the topper, then sprinkle the orange dust.
  • Enjoy!

Balsamic Chicken with Roasted Vegetables. One One Pan Wonder!

Beautiful, delicious food doesn’t have to take a million steps to prepare. Check out this one pan wonder…

Dinner doesn’t always have to have dramatic preparation to be both beautiful and delicious. Last night when I got home late, my husband already had the chicken marinating in a balsamic concoction. All I did was figure out what vegetables to throw on a pan and dinner was underway!

I opted for beautiful tri-colored baby carrots, purple potatoes and spiralized beets. (I am on a spiralizing kick lately!) I sprinkled on some olive oil and salt and pepper, then popped them into the oven at 400 degrees for 15 minutes. At 15 minutes, take them out and make a little room on the pan, then add your chicken and pop it all back in the oven for twenty minutes. Last night I got involved with writing for another site and I forgot this step which is why you see no chicken on this pan. No worries. I baked the chicken in the pan it was marinated in.

And here is the finished product. Aren’t they beautiful? Here, I usually sprinkle on a little more pepper and call it a day.

Here is my plated dinner. Okay, I lied. At the last minute we had a taste for some steamed broccoli so we made it. We could have just as easily roasted it on the same pan as the other veggies, but we didn’t decide on it until the other stuff was already in the oven. Beautiful and delicious and no one has to know how simple and easy it was to prepare.

Unless you write a blog about it to tell the world!


Balsamic Marinade Ingredients

  • 1/4 cup extra virgin olive oil
  • 1/4 cup balsamic vinegar
  • 1 clove minced garlic
  • 1 1/2 tablespoons Italian seasoning
  • 1 Tbsp honey(optional)
  • 3/4 teaspoon salt
  • 1/2 teaspoon ground black pepper
  • 1-4 pounds boneless skinless chicken (There are just two of us so we usually opt for chicken tenderloins as they cook very fast.)

Directions

(Are you ready for this?)

  • Whisk together all ingredients.
  • Pour over chicken.
  • (Wipe the sweat from your brow. That was hard!)

How long you wish to leave the chicken marinating is entirely up to you. I like to let mine sit from 1-4 hours. Just cover it and put it in the fridge. Take it out and let it sit at room temp for at least 30 minutes prior to cooking. If you are in a rush, just let it sit half an hour, it will still be great.

Bake at 400 degrees approximately 20-25 minutes.


For the one pan dinner:

  • Preheat oven to 400.
  • Decide on what veggies you like, roll them around in 1-2 Tbsp olive oil and salt & pepper.
  • Pour them on a sheet tray.
  • Bake 15 minutes, add chicken to the pan, bake 20-25 minutes more.

Use your common sense here. If you are roasting soft veggies that will cook fast like zucchini, yellow squash, onions, tomatoes, etc. Put everything, including the chicken, on one pan and cook them together.

When you are roasting dense veggies like potatoes, beets, carrots, parsnips, acorn squash, etc, start them in the oven at least 15 minutes before adding the chicken.